Showing posts with label Going Green. Show all posts

Thursday, February 28, 2013

Simple, Natural All-Purpose Cleaner

Photo Credit
I have slowly but surely been eliminating the use of chemicals in our home. What pushed me to go for it was that, even when I tried to keep them up and away from the kids, they seemed to find a way to get them as soon as my back was turned. This homemade cleaner is easy, inexpensive, and very effective. The best part? The kids could drink it and it wouldn't hurt them at all! I use this in the kitchen and bathroom, as well as on all our floors. The ingredients make it a great germ-buster too.

All-Purpose Cleaner
1 part white vinegar
2 parts water
A few drops of essential oil such as OnGuard. Lemon and Orange oil are also great for cleaning. The amount of essential oil you use will depend on the size of your spray bottle.

Add all to spray bottle & shake to mix. The oils can separate a bit, so I try to shake or swirl it once in a while during use. Happy cleaning!

Sunday, February 24, 2013

Natural Foaming Hand Soap

Think making your own foaming hand soap is difficult or expensive? It doesn't have to be! I got a simple foaming hand soap at the dollar tree. When that soap was used up, I decided to make my own (more natural) soap.This soap is great because the essential oil in it is not only anti-bacterial, but anti-viral. And it smells amazing! Do you want to know another little secret? I sneak this soap into the shower and use it as a shampoo. My hair comes out clean and soft, no conditioner needed.

What you need:
*An empty foaming soap dispenser
*Water
*5 drops doTERRA OnGuard Essential oil (or the essential oil of your choice). You will see the retail price of the oil in the link, but you can sign up for a membership and get all of their oils at a discounted rate if you'd like.
*1-2 Tbsp liquid Castile soap

Castile soap is amazing since you can use it for so many things AND it is concentrated, so you can dilute it and it will last you a long time. I have done a lot of shopping and found the best price on Castile soap online here on vitacost:


First, fill the container most of the way with water, then add the soap and essential oil. Screw the pump back on and shake to mix. It's as simple as that.

Happy soap making!

Saturday, February 02, 2013

Our Diaper Set-up

Being that William is our third child in cloth diapers, things have changed over the years that we've used them. I find that mamas who cloth diaper - or are interested in trying cloth - like to see how other people do things! So, for all you curious mamas, here is how we currently have things set up.

For a while, since we had more than one child in diapers, we had things set up out in the living room on a bookshelf and just changed the kiddos on a pad in the middle of the floor. Now that William is the last one in diapers (yay!), we have a changing table set up in his room.

On the side are clean wipes and fleece liners. The liners make it super easy to spray messes off of diapers. I use an old disposable wipes container for the wet wipes. Some people like to make a wipes solution, but I just wet a stack of wipes with water.

The top drawer holds a few disposables, extra changing pad covers, baby powder, cloth-safe diaper cream, lotion, and a bag of pins and snappies for pinning prefolds and flats.

The second drawer down is where we keep various sizes of wetbags for holding dirty diapers, as well as some extra inserts for pocket diapers.

The third drawer has our bumgenius "Flips". These are organic cotton inserts that go in a cover with flaps on either end to tuck the inserts in. We use these for our nighttime diapers, as they are super absorbent! 

The bottom drawer has all the covers to go over fitteds, flats, and prefolds. 

Behind the door are all the diapers. The top shelf has all the prefolds and flats (you need pins or snappies for these).

On the bottom are the pocket diapers and all-in-ones on the left (you don't need an extra cover for these) and fitteds on the right (you do need a cover for these).

 When we are out and about, we pack the diaper bag with a few all-in-ones or pocket diaper, a wetbag for holding dirty diapers, and a small case of wet cloth wipes. We also carry a few other basic essentials like a change of clothes, some hand sanitizer, and diaper cream.

In the bathroom, we have attached a diaper sprayer to the toilet, which makes dirty diaper clean-up a breeze. I would be hesitant to cloth diaper without one! 
 

When they are all sprayed off, they go in the diaper pail. Wet diapers get thrown directly in the pail. When the pail gets full, I dump the whole thing in the washer. The wash routine that works well for us is a cold rinse, then a hot wash cycle with half a scoop of powdered Tide original, some oxyclean, and a splash of vinegar for fabric softener. Dry on high heat. I choose to air dry covers and the outer shell of pocket diapers so they last longer. That's it!

Wednesday, January 30, 2013

Reusable Roundup!

As a frugal mama who also likes to reduce unnecessary waste, I have slowly replaced everything disposable with a reusable option. So far, here is what we use (and reuse)!

 Cloth diapers and wipes. Detailed posts on this coming soon!:

Facial tissues out of cut-up t-shirts that are getting too worn to wear. I found a pretty box from a Christmas present I got this year and cut a hole in the top large enough for us to grab tissues out:

Here they are all washed and ready to use. And oh-so-soft:

 Cloth wipes for messy hands and faces. I just cut flannel receiving blankets into the shape of wipes. I like to use separate wipes from the ones we use for bottoms, so these get thrown in with the regular laundry.

No more paper towels! We still use the occasional paper towel for really gross or greasy messes, but for the most part we use kitchen towels. Some of our kitchen towels are white burp cloths from when the kiddos were babies (think Gerber prefolds- not thick enough to use as diapers, but perfect for the kitchen). We also use smaller washcloth style rags to wipe the counters down after spraying them with vinegar and essential oil. No more expensive clorox wipes or kitchen cleaners! For dirty jobs like floors, bathrooms, and dusting, we have a stash of plain microfiber cloths under the kitchen sink: 

Cloth napkins! I keep these in a basket in the corner of the dining room for easy access. The basket that I got for $1 at Goodwill Outlet. Score! These napkins go with us in school/work lunches, too:

 Good old-fashioned handkerchiefs. Hubby and I both grew up with our Dads using these, so naturally hubby uses them, too. Now when they become threadbare, I sew a few more from a large white sheet that got a hole in it. We won't have to buy hankies for years, now:
 Ok, so I admit this might not be for everyone, but I find them to be comfortable and easy. Cloth pads/liners, which I just throw in with the diaper laundry. No more running to the store at the last minute for unmentionables ;)

Do you have any other items to add to this list? If you do, please share them!

Tuesday, January 15, 2013

It's All in the Jeans


Ever wonder what to do with those jeans that are getting a little too worn to wear? I try to get creative with things, so as not to waste them. I have also been building our cloth napkin stash so that we don't need to buy paper napkins. This project killed two birds with one stone!

Recently, when a pair of David's jeans wore thin in too many places, I took them and laid them flat on the ground. I cut the seams off each leg of the pants, getting as close to the seams as I could. Then I cut it into pieces of appropriate napkin length (this will be personal preference). I ended up with about 4 napkins from each leg; two from the front and two from the back. With each napkin, I turned it over, folded the edge down one time, and zig-zag stitched around the edges with my sewing machine. If you wanted a nicer finish and your machine could handle it, you could certainly fold the edges over twice. I didn't want to risk damaging my machine and we really don't mind the fraying for everyday use, so I just decided to fold it once. No pinning necessary, either. Just fold and sew!

Here is my neat little stack of napkins:
Mission accomplished!

Friday, September 16, 2011

My Recent Endeavors!

I'm really enjoying our new little home. Here are just a few of the things I've been busy with lately. Canning has been big on my to-do list. I've made a few jars of pickles and plenty of jam, including strawberry, strawberry-peach, and strawberry-rhubarb. I even tried my hand at some plum jam from all the plums off our tree and I must say that it turned out quite tasty! I also made a large jar of cranberry sauce for the holidays, and oh, did the house smell heavenly after that one. In addition to canning, I've processed and frozen several batches of zucchini and rhubarb for breads and pies this winter. Tomorrow I'll be peeling, slicing, and canning the numerous bags of pears that came off our tree. Whee!!
As for the rest of the garden, our cool summer hasn't been the best for production (of course, neither was transplanting). I've gotten a grand total of 4 pumpkins, a handful of cucumbers, and a few tomatoes. There should be a good 8 or so small cantaloupe to harvest here in a bit. But when we moved, I had to leave behind my snap peas, pole beans, corn, and two gigantic tomato plants. I am sure that whoever rented that house is loving them. As for my green peppers and jalapenos? I got two small ones from each plant. Ah, well, there is always next year. Oh, and see that shed back there behind the garden? I've been moving wood from the fence to that shed. I've still got a bit to do, but I'd guess that we have almost enough wood to last us through the season. That should really help us cut down on heating costs... and cooking costs, since I can throw pots of soup/stew on the top of the stove as well.
I've been loving our outdoor clothes-drying rack. But, given our apparent lack of summer and early arrival of fall, I decided to string up some lines in the basement. Here's hoping that they'll dry quickly enough when the weather is cool and damp.
My next project? Building a chicken coop with all the scraps of lumber that were strewn all over the yard. That's right, we'll be getting chickens. Not only will we not have to run to the store for eggs, but we'll save on waste since chickens love table scraps.

Hmmmm, and should we add a puppy to the mix? I don't know, but one of my longest and dearest friends just announced that her dog had 8 puppies. It's tempting....

Tuesday, May 17, 2011

Did you notice the new blog title?

(Photo Credit)
I've decided to change my blog title from Bedrest and Beyond to Natural Mom on a Shoestring. I feel like this new title really fits where I'm at now. I'll still have my same blogger web address, but the pregnancy and bed rest is now behind me. Therefore, I wanted to go with something that encompasses what I'm all about, as well as what I'm aspiring to be. I'm striving to be as natural as I can be within our budget. Although I still have a long way to go, I've started the journey of becoming more mindful of how we treat our bodies and the world around us. As far as we're able, I've been making small changes. After all, I believe that many small changes equal big change.

One of my recent experiments was making my own laundry detergent. Several of my friends have had success doing so, so I decided to take the plunge as well.

You will need:
5-gallon bucket (I used one from our powdered Kirkland laundry soap)
1 bar Fels Naptha soap
1 C Washing Soda (not baking soda- found in laundry aisle)
1 C Borax
fragrance or essential oil, if desired
water

Grate the bar of soap into a large saucepan. Add 4 C water. Heat and stir with a wisk until soap is dissolved. Add washing soda and borax, stirring until dissolved. Pour mixture into bucket and fill with warm/hot tap water. I filled it until about the 4 gallon level, maybe a bit higher. Stir well and cover with lid. Let sit overnight. The mixture will become slightly jelly-like. Once gelled, you can add some of your favorite essential oil or fragrance oil. I added some cinnamon & nutmeg fragrance oil and it smells oh-so-good. Detergent should be shaken or stirred before each use, so putting it into an old fabric softener bottle or laundry soap bottle is a good idea. Use around 1/4 C for each load. You may need a bit more or less depending on your water or how soiled your load is.

Here is my first batch:
I just finished using up my previous laundry soap today, so I'll let you know how well this cleans our clothes. If it cleans well, it's quite the bargain at around $2 per batch. Now, that's frugal!

Friday, April 15, 2011

Why I Love Cloth Diapers

1.) I never have to run out and buy diapers or wipes because they're always on hand.
2.) Rashes are few and far between.
3.) Blowouts are also rare. When we've taken a break from cloth in the past, I've always been glad to get back to it because of all the poo-plosions we've had in disposables.
4.) They reduce waste in landfills.
5.) They can save a lot of money.
6.) I like knowing that my baby's skin is soft, comfy, and free of chemicals.
7.) It makes me happy to pull a load out of the dryer, fold them with the girls, and see the pretty, folded stacks of colorful diapers.
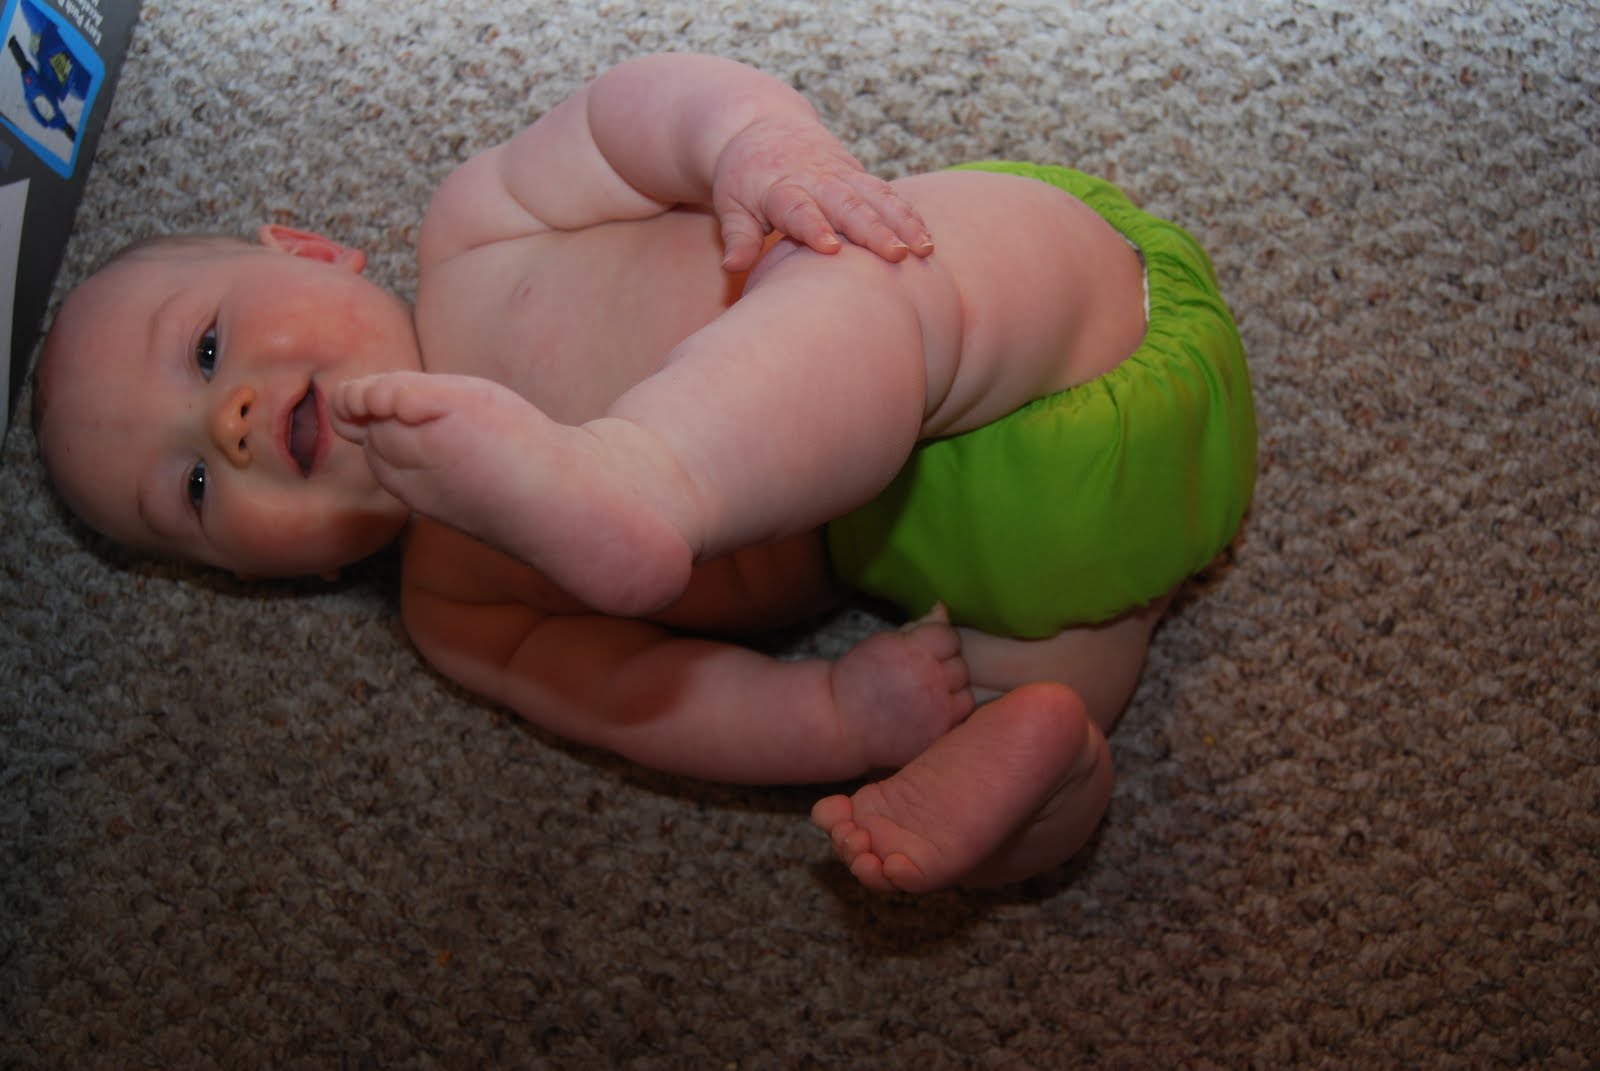
8.) Last but not least, they are just so stinkin' cute, as evidenced by William sporting one of his dipes for you.


Thursday, March 24, 2011

Fun With Gardening

I'm really getting into planning my container garden now that Spring is finally here. I'm starting quite a few seeds inside right now, and this morning I even went outside and transplanted my kohlrabi, cabbage, and brussel sprouts to their pots. In addition to these, I'm planning on growing spinach, lettuce, bell peppers, jalapeno peppers, tomatoes, onions, green onions, fava beans, pole beans, zucchini, beets, kale, chard, and cucumbers. In the next week or two I will be planting several more things directly outside in the ground and in pots. It's really exciting to see the little sprouts coming up. I can't wait to see how they do over the summer.

Wednesday, February 23, 2011

My attempt at indoor line-drying...

Today has been a pretty low-key day here at home. Since my homework is done for the week, I've been able to focus more on things around the house. Yesterday I tackled the filing cabinet, and while I still have a box of papers to file and a box of papers to shred, I made HUGE progress in a few hours. A couple more hours and it should be completely done, aside from putting our medical insurance info. in order. What with the pregnancy, I had two surgeries, a 7-week hospital stay, weekly appointments, childbirth, another surgery, and multiple doctor visits for the kids (since they were in day care throughout the fall, we were sick all the time!). That will be a longer project to get organized, but it's at least all in the same folder in the filing cabinet now. Today's project has been figuring out how to effectively line-dry inside.

I actually started with a load of diapers on the drying rack by a heater vent in the living room night before last. After a day and a half, the all-in-ones were still not dry, whereas the flats were dry within a few hours. I have been using flats as inserts in our Flip covers since yesterday, so our all-in-ones will be saved for daddy or outing use. That way they will last longer and diapers will be dry faster, too :).

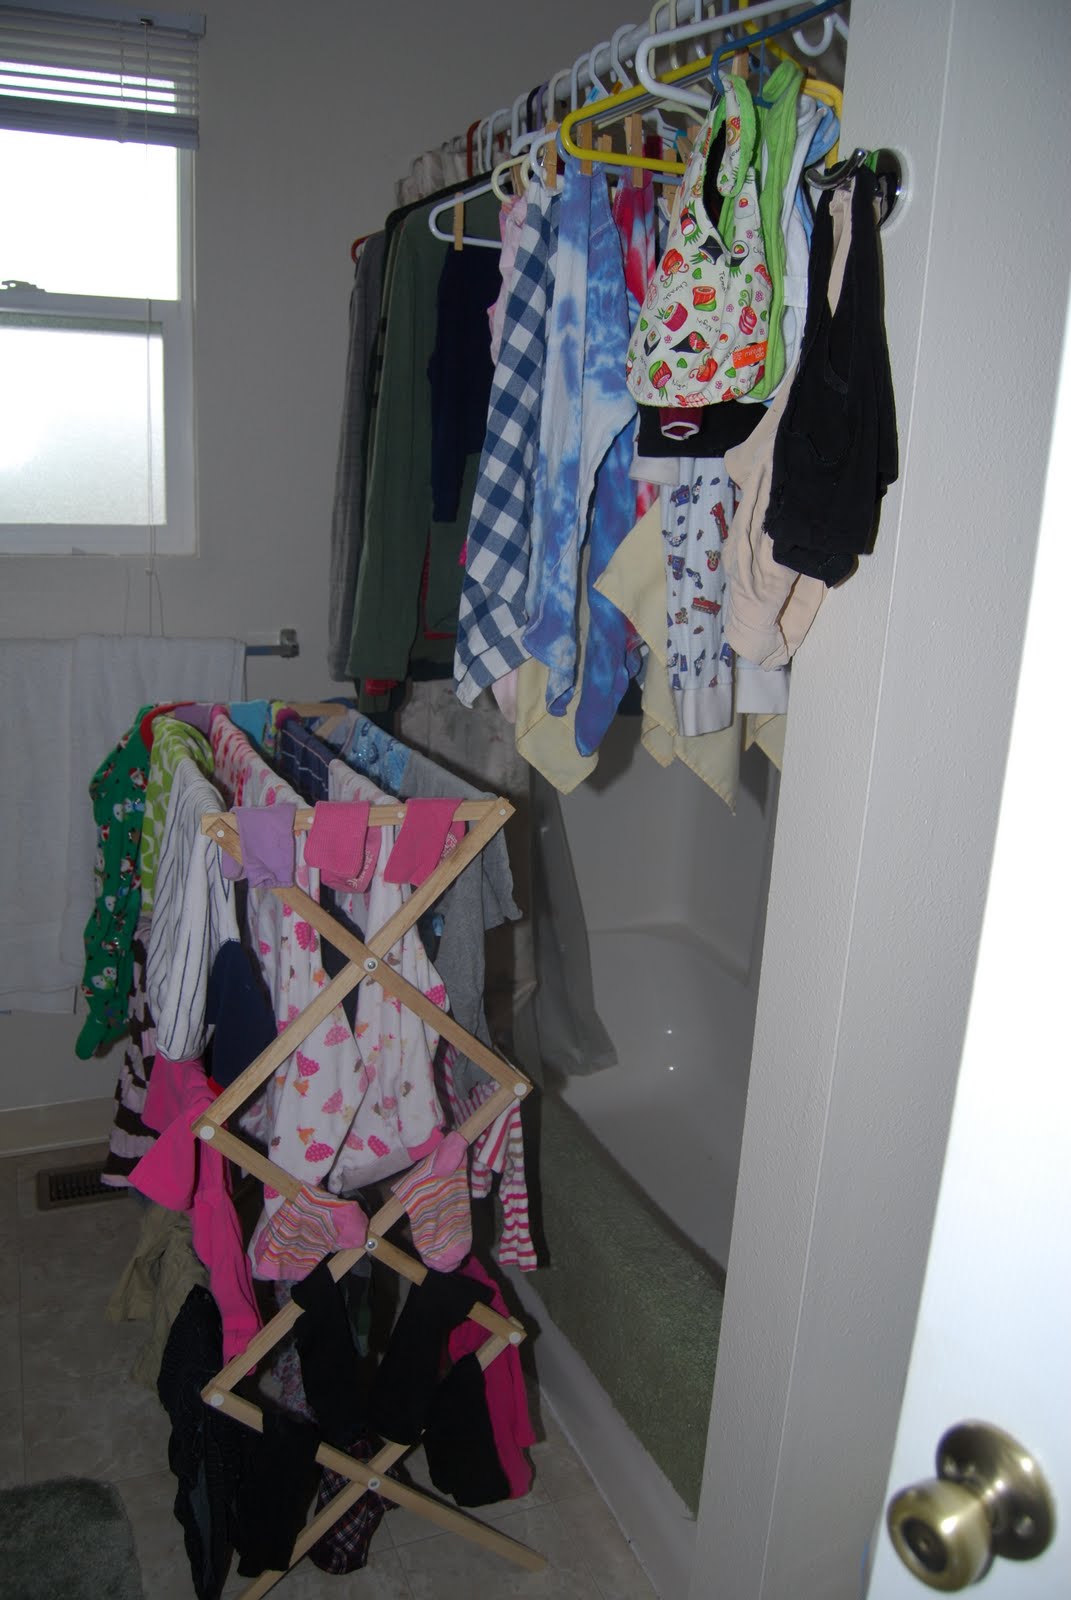
So, here is what I figured out for the rest of the laundry. I am utilizing the collapsible drying rack I have, plus the shower curtain rod with plastic hangers and wooden clothespins. I'm curious to see how fast things will get dry, especially since the heater vent doesn't really work in the bathroom.

Here's what the setup looks like in our small bathroom (the toilet and the sink are to the left of the laundry, and the washer and dryer are in alcoves on either side of where I am standing):
To save on space, I decided to pin one corner of each napkin, washcloth, and burp cloth, lining them up along a hanger (I also pinned some of the kids' clothes up like this as well).

The bibs I just fastened along the bottom of one hanger (yes~William goes through a lot of bibs since he's a big spitter).
I think this setup will work for a while, but I'd like to figure something else out eventually. It's going to have to remain indoors due to the amount of rain we get around here, but still be relatively out of our way.


Wolf-it-down Wednesday

B: Homemade granola and chocolate chip banana muffins.
L: Organic tortilla chips with salsa and "rockamole," as Dorothy calls it. The kids had shepherd's pie and David had the rest of the BBQ chicken pizza.
D: Clam chowder, toast, and veggies.