Friday, June 07, 2013

My Dreads!

On March 3rd, I took the plunge and got my dreads done at Akemi Salon by the lovely Stephanie, AKA the Dread Goddess. She uses a Thai style dreadlock technique in which she backcombs each section (teases it with a comb) and then crochets it. It is truly an art form and I have loved them from day 1! They have been low-maintenance from the beginning, which is so much better than when I made them on my own a couple of years back. As a part of the original price, she tightened them up a few times within the first 6 weeks. Since my hair is short, I chose to put rubber bands on the ends until it locks up nice and tight, which has pretty much happened now :). Yay!

Here I am on day 1 of dreads:

This is at 1 week after getting them tightened up the first time:
 This is at 2.5 weeks with a wrap that my sister-in-law got me:
 Here I am a few days ago at about 3 months in. Most of them are locked quite nicely!

 
I got myself the right size of crochet hook... teeny tiny... and have been watching youtube videos on maintenance so that I can do so on my own. I have since tightened up all of my roots and it's working really well. In my youtube searches, I ran across a good number of videos on how to make permanent dreadlock extensions out of real hair and am excited to try it. The hair itself costs very little and I'll make them gradually as I have spare moments. This way I can have longer locks that I can pull back more easily and style creatively.

In all, it's been a great process and I get compliments from strangers almost every time I go out to run errands. I was fully prepared for a lot of negative feedback, so I've been pleasantly surprised at that! I'll be sure to post periodic updates as they mature.

Thursday, May 23, 2013

My Angel

(Photo Credit)
As I was reading through some old writing of mine, I ran across a piece that I wanted to share. It's about an encounter I had when I was driving home from my job as a preschool aide when I was 20. I hope it blesses you as it did me.

~My Angel~
My angel, I discovered, was not so obvious as one might assume. No wings. No grand, singing entrances. No trumpets or loud announcements. A simple woman. Any other person on the street; but to me... so much more. She turned to me slowly at first, as she appeared to be headed somewhere, with an armful of books and a determined look on her face as she crossed the street. In one hand she held a small bunch of pink flowers. I smiled at her when she looked my way, not so much out of gladness to see her, but as a routine gesture of kindness. Suddenly, her face lit up like I had given her the most valuable gift. She walked swiftly toward my car as I rolled down the window, quite puzzled at what she might want. Then, she reached down and pulled out a single flower and placed it in my outstretched hand. Not a word was spoken on her part. She just handed me the flower and walked away as quickly as she had come. And I was left with the reminder that God does not forget the little things that bring us joy, and every once in a while when we have days where nothing seems to make sense, he sends an angel... which may be nothing more than a stranger with a friendly smile and a little bunch of pink flowers.

~Becci, 2000~

Thursday, February 28, 2013

Simple, Natural All-Purpose Cleaner

Photo Credit
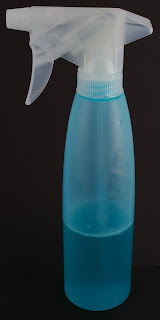
I have slowly but surely been eliminating the use of chemicals in our home. What pushed me to go for it was that, even when I tried to keep them up and away from the kids, they seemed to find a way to get them as soon as my back was turned. This homemade cleaner is easy, inexpensive, and very effective. The best part? The kids could drink it and it wouldn't hurt them at all! I use this in the kitchen and bathroom, as well as on all our floors. The ingredients make it a great germ-buster too.

All-Purpose Cleaner
1 part white vinegar
2 parts water
A few drops of essential oil such as OnGuard. Lemon and Orange oil are also great for cleaning. The amount of essential oil you use will depend on the size of your spray bottle.

Add all to spray bottle & shake to mix. The oils can separate a bit, so I try to shake or swirl it once in a while during use. Happy cleaning!

Tuesday, February 26, 2013

Slow Cooked Breakfast Cereal

When I was chatting with my friend the other day, she told me that she likes to make oatmeal in her crock pot overnight using steel cut oats. It sounded wonderful, so I thought I would give it a try. It's super easy and the best thing about it is that breakfast is ready when you wake up in the morning. I hope you enjoy this as much as I did! And thanks to Kristin for sharing :)


Start out by finding a big enough bowl to fit in your crock pot. Put in 1 C of cereal. I used some 12-grain cereal this time, but steel cut oats are next on my list to try. Add 4 C water and a dash of salt and stir it lightly. Fill the crock pot with water up to the line of the water that is in the bowl. Cover and cook on low for 10 hours.


 When you get up in the morning, stir the cereal and it will look like this. So easy! This batch was enough for 2 medium sized bowls for hubby and I and 3 smaller bowls for the kids. If you have a larger family, just use the crock pot itself so you can add more. I liked this because of the easy clean-up ;)


 We try all kinds of things in our cereal. This goodness is ground flax, raw honey, raisins, and cinnamon.

Monday, February 25, 2013

Apple Cinnamon Buckwheat & Cornmeal Pancakes

The other morning before I took Dorothy to school, I was in the mood for some nice, hearty pancakes. I couldn't decide whether to make them with buckwheat flour or cornmeal, so I decided to try both, and I was really pleased with how they turned out. They were moist, fluffy, and delicious! I topped mine with natural almond butter, but they would also be wonderful with maple syrup, honey, or molasses. For a lighter topping, try yogurt or applesauce.


Apple Cinnamon Buckwheat & Cornmeal Pancakes
1 C unbleached all-purpose flour
1/2 C buckwheat flour
1/2 C cornmeal
2 Tbsp agave nectar, honey, or raw sugar
2 tsp baking powder
1/2 tsp baking soda
dash of salt
1/4 C dried apples, diced
1/2 tsp cinnamon or pumpkin pie spice
1 egg, beaten
1 1/2 C buttermilk
3 tbsp oil

Stir together dry ingredients. Add wet ingredients to dry and whisk together until moistened. Pour by 1/4 to 1/3 C onto hot oiled griddle. Cook until bubbles form and begin to pop (under side should be golden brown), then flip and cook until other side is golden brown. 

Serve hot with your favorite topping.


Sunday, February 24, 2013

Natural Foaming Hand Soap

Think making your own foaming hand soap is difficult or expensive? It doesn't have to be! I got a simple foaming hand soap at the dollar tree. When that soap was used up, I decided to make my own (more natural) soap.This soap is great because the essential oil in it is not only anti-bacterial, but anti-viral. And it smells amazing! Do you want to know another little secret? I sneak this soap into the shower and use it as a shampoo. My hair comes out clean and soft, no conditioner needed.

What you need:
*An empty foaming soap dispenser
*Water
*5 drops doTERRA OnGuard Essential oil (or the essential oil of your choice). You will see the retail price of the oil in the link, but you can sign up for a membership and get all of their oils at a discounted rate if you'd like.
*1-2 Tbsp liquid Castile soap

Castile soap is amazing since you can use it for so many things AND it is concentrated, so you can dilute it and it will last you a long time. I have done a lot of shopping and found the best price on Castile soap online here on vitacost:


First, fill the container most of the way with water, then add the soap and essential oil. Screw the pump back on and shake to mix. It's as simple as that.

Happy soap making!

Saturday, February 02, 2013

Our Diaper Set-up

Being that William is our third child in cloth diapers, things have changed over the years that we've used them. I find that mamas who cloth diaper - or are interested in trying cloth - like to see how other people do things! So, for all you curious mamas, here is how we currently have things set up.

For a while, since we had more than one child in diapers, we had things set up out in the living room on a bookshelf and just changed the kiddos on a pad in the middle of the floor. Now that William is the last one in diapers (yay!), we have a changing table set up in his room.

On the side are clean wipes and fleece liners. The liners make it super easy to spray messes off of diapers. I use an old disposable wipes container for the wet wipes. Some people like to make a wipes solution, but I just wet a stack of wipes with water.

The top drawer holds a few disposables, extra changing pad covers, baby powder, cloth-safe diaper cream, lotion, and a bag of pins and snappies for pinning prefolds and flats.

The second drawer down is where we keep various sizes of wetbags for holding dirty diapers, as well as some extra inserts for pocket diapers.

The third drawer has our bumgenius "Flips". These are organic cotton inserts that go in a cover with flaps on either end to tuck the inserts in. We use these for our nighttime diapers, as they are super absorbent! 

The bottom drawer has all the covers to go over fitteds, flats, and prefolds. 

Behind the door are all the diapers. The top shelf has all the prefolds and flats (you need pins or snappies for these).

On the bottom are the pocket diapers and all-in-ones on the left (you don't need an extra cover for these) and fitteds on the right (you do need a cover for these).

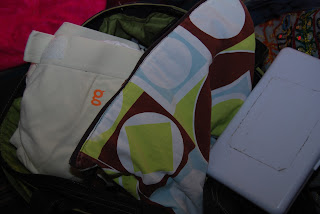
 When we are out and about, we pack the diaper bag with a few all-in-ones or pocket diaper, a wetbag for holding dirty diapers, and a small case of wet cloth wipes. We also carry a few other basic essentials like a change of clothes, some hand sanitizer, and diaper cream.

In the bathroom, we have attached a diaper sprayer to the toilet, which makes dirty diaper clean-up a breeze. I would be hesitant to cloth diaper without one! 
 

When they are all sprayed off, they go in the diaper pail. Wet diapers get thrown directly in the pail. When the pail gets full, I dump the whole thing in the washer. The wash routine that works well for us is a cold rinse, then a hot wash cycle with half a scoop of powdered Tide original, some oxyclean, and a splash of vinegar for fabric softener. Dry on high heat. I choose to air dry covers and the outer shell of pocket diapers so they last longer. That's it!

Wednesday, January 30, 2013

Reusable Roundup!

As a frugal mama who also likes to reduce unnecessary waste, I have slowly replaced everything disposable with a reusable option. So far, here is what we use (and reuse)!

 Cloth diapers and wipes. Detailed posts on this coming soon!:

Facial tissues out of cut-up t-shirts that are getting too worn to wear. I found a pretty box from a Christmas present I got this year and cut a hole in the top large enough for us to grab tissues out:

Here they are all washed and ready to use. And oh-so-soft:

 Cloth wipes for messy hands and faces. I just cut flannel receiving blankets into the shape of wipes. I like to use separate wipes from the ones we use for bottoms, so these get thrown in with the regular laundry.

No more paper towels! We still use the occasional paper towel for really gross or greasy messes, but for the most part we use kitchen towels. Some of our kitchen towels are white burp cloths from when the kiddos were babies (think Gerber prefolds- not thick enough to use as diapers, but perfect for the kitchen). We also use smaller washcloth style rags to wipe the counters down after spraying them with vinegar and essential oil. No more expensive clorox wipes or kitchen cleaners! For dirty jobs like floors, bathrooms, and dusting, we have a stash of plain microfiber cloths under the kitchen sink: 

Cloth napkins! I keep these in a basket in the corner of the dining room for easy access. The basket that I got for $1 at Goodwill Outlet. Score! These napkins go with us in school/work lunches, too:

 Good old-fashioned handkerchiefs. Hubby and I both grew up with our Dads using these, so naturally hubby uses them, too. Now when they become threadbare, I sew a few more from a large white sheet that got a hole in it. We won't have to buy hankies for years, now:
 Ok, so I admit this might not be for everyone, but I find them to be comfortable and easy. Cloth pads/liners, which I just throw in with the diaper laundry. No more running to the store at the last minute for unmentionables ;)

Do you have any other items to add to this list? If you do, please share them!

Tuesday, January 15, 2013

It's All in the Jeans


Ever wonder what to do with those jeans that are getting a little too worn to wear? I try to get creative with things, so as not to waste them. I have also been building our cloth napkin stash so that we don't need to buy paper napkins. This project killed two birds with one stone!

Recently, when a pair of David's jeans wore thin in too many places, I took them and laid them flat on the ground. I cut the seams off each leg of the pants, getting as close to the seams as I could. Then I cut it into pieces of appropriate napkin length (this will be personal preference). I ended up with about 4 napkins from each leg; two from the front and two from the back. With each napkin, I turned it over, folded the edge down one time, and zig-zag stitched around the edges with my sewing machine. If you wanted a nicer finish and your machine could handle it, you could certainly fold the edges over twice. I didn't want to risk damaging my machine and we really don't mind the fraying for everyday use, so I just decided to fold it once. No pinning necessary, either. Just fold and sew!

Here is my neat little stack of napkins:
Mission accomplished!

Monday, January 14, 2013

Re-purposing Glass Jars

One of my favorite things to do is find a way to re-use jars that used to hold food. It seems such a waste to throw a perfectly good jar in the recycling bin when there are so many things you can do with them! I have found uses for all shapes and sizes of jars. 

One thing I had plenty of was baby food jars left over from when the kiddos were small. I have used them for various things, such as beads, thumb tacks, small nails, and more. But my all-time favorite project was this spice rack. I love buying bulk spices at WinCo, so the small fruit and vegetable jars worked really well to hold them. The added bonus to using baby food jars is that the lids are metal. I made my way to Ikea for some magnetic knife racks and... voila! My spices are not only practically placed and accessible right next to my stove, they are also attractive. I love how they are all so colorful. They do have simple masking tape labels on them, but I know the look of my spices so well now that I can just look at it and know what it is. The best part? I am saving cupboard space! A necessity in a small kitchen with no pantry.

How do you organize your spices? Please share!


Wednesday, January 09, 2013

A Frugal Fourth Birthday.

My daughter turned 4 on Monday, so we celebrated her Birthday over the weekend. When I asked her what kind of party she wanted, we settled on Strawberry Shortcake. It's one of her favorite shows to watch, and we both thought it would be cute. If you know me at all, you know I love the challenge of spending as little as possible on Birthday parties, but still making them fun. Here is what I came up with!

We put up red balloons and pink streamers from the grocery store.
 For their activity, I found some free printable coloring sheets from various websites that they were able to color and cut.
 I scored when I found this free printable banner online. I used cardstock leftover from our homemade wedding invites, and strung it up with yarn from my craft shelf. The number 4 I printed on cardstock as well, then colored it with marker. The pictures on either side are cut out from the cover of an old strawberry shortcake coloring book.
 For the cupcakes, I printed tags I found online and taped them on colored toothpicks. The frosting is homemade and the cake mix was from Gleaner's. I blended some defrosted cherries in with the liquid for the cake mix. They turned out moist and delicious!
The other online printable I found and printed on the cardstock was a pattern for a birthday hat. I used the colorsaver setting on the printer to save on ink.
 
Charlotte had a wonderful Birthday party for very little out-of-pocket cost! One happy girl and one happy mama :)

What are your favorite frugal party ideas?

Thursday, January 03, 2013

A Beautiful New Year

Has it really been a year since I last wrote? I find that (most days) I write in my head, but the ideas never make it onto the page. Nevertheless, here I find myself catching a quiet moment. The last year has been good to us.

A Spring filled with Bible study, Dorothy finishing Kindergarten, and our family finding a new church. Oddly enough, we weren't even searching for one, but we absolutely love where we are. It's such a loving, faithful group of people.

A Summer filled with gardening, camping, William turning 2, Dorothy turning 6, and finally finishing the coop and buying chickens. As of now, we have 3, but soon we'll get a permit for 3 more so that we can keep them for a friend.

A Fall filled with canning, apple picking, cider making, baking, getting a small dog, and Dorothy going to first grade. Also this Fall? I began the Doula Practicum at Birthingway College of Midwifery so that I can finish my certification and work as a doula. I am so thrilled with how it has been going, and can't wait until March when I will be finished certifying and able to launch my very own business. A business doing something I love!

Now here we are. It's Winter again. We just had an amazing Christmas filled with family, friends, and thankfulness. I am excited about this year and all that God has in store for us. I don't normally make resolutions, but this year I do have some goals. Here they are in no particular order.

~Create a website for my doula business.
~Create an Etsy shop for my crafty things and art.
~Launch my new business as a doTerra essential oil consultant. I am really excited about this one, since I think it will really compliment my doula practice.
~Focus on my health. Get regular sleep, exercise, cut out sugar, and take some time for relaxation.
~Research and prepare curriculum for homeschooling the kids. Starting in the fall, I will be teaching my children at home. Dorothy in 2nd grade, Charlotte in Pre-K, and William doing some beginning preschool activities.
~Finish organizing and getting rid of things in the basement (this is my laundry area and where we will do school next fall.
~Live in the moment, appreciate my blessings, and love/serve people to the best of my ability.

Do you have any goals for the New Year?